
Mixing in Logic Pro: Why Stock Plugins Are All You Really Need
- Leiam Sullivan
- Apr 30, 2025
- 7 min read
Updated: 2 days ago

I could mix a record using nothing but Logic's plugins.
I don't.
I've collected far too many plugins over the years.
Compressors.
EQs.
Saturators.
Reverbs.
Some I use all the time.
Some I've probably forgotten I own.
But I've used Logic since 2000.
And if you took every third-party plugin away from me tomorrow, I could still mix.
The tools are already there.
You just need to know what they do.
1. EQ: Channel EQ, Linear Phase EQ & Vintage EQ Collection

Channel EQ
Logic's Channel EQ is one of those plugins I use without really thinking about it.
Not because it's exciting.
Because it does the job.
High-pass.
Low-pass.
Find a problem.
Cut it.
Shape the sound.
Move on.
I've got expensive EQs.
EQs that add colour.
EQs modelled on old hardware.
But if I just need to EQ something, Channel EQ is usually already open.
I know it.
I trust it.
That's worth more than another plugin.
When I Need Something Else


Channel EQ does most of the work.
But not all of it.
If I'm making a very precise move across a bus or a full mix, I might reach for Logic's Linear Phase EQ.
And if I want the EQ itself to add something, I'll use the Vintage EQs.
Console.
Graphic.
Tube.
They all make me work differently.
That's the thing with character EQs.
Sometimes the controls change the decisions you make.
You stop staring at the spectrum.
Turn a dial.
Listen.
I've got third-party versions of the hardware these EQs are based on.
I still use them.
But Logic already gives you the same ways of thinking.
Clean when you need clean.
Colour when you want colour.
2. Compression in Mixing with Logic Pro


I've been using Logic's compressor since there was only one.
Back then it was Platinum Digital.
I used Platinum Digital for years.
Religiously.
And it did the job brilliantly.
I learnt compression with it.
I knew how it reacted.
Turn the dials.
Listen.
Get what I wanted.
I never felt like I was missing anything.
The Vintage Models
Then Apple added the vintage models.
FET.
Opto.
VCA.
Different compressors.
Different ways of controlling a sound.
If you're trying to understand which one to use, this is the simplest way to think about them.
Studio FET – 1176-style

Fast and aggressive.
Vocals.
Snares.
Parallel compression.
Anything you want the compressor to grab quickly.
Vintage Opto – LA-2A-style

Slower.
Smoother.
Vocals.
Bass.
Pads.
When you want the level controlled without the compression feeling too obvious.
Classic VCA – dbx-style

Punch.
Drums.
Percussion.
Anything that needs to move forward.
Studio VCA – Clean VCA-style

Cleaner.
More controlled.
Synths.
Stereo instruments.
Compression without too much character.
Vintage VCA – SSL G Bus-style

Glue.
Drum buses.
Groups.
Mix buses.
When several sounds need to start feeling like one thing.
Vintage FET – 1176 Blue Stripe-style

The more aggressive FET.
Parallel chains.
Distorted sounds.
Anything you want to push.
Why Logic's Compressor Is So Useful
There's a lot built in.
A mix control.
Sidechain filtering.
Different output distortion modes.
You can work clean.
Or push it.
I've used hardware.
I've used UAD.
I've used plenty of third-party compressors.
But Logic's Compressor gives you a lot to work with.
Once you know what each model does, you stop looking at them as extra options.
You pick the compressor you need.
3. Reverb


My first Logic reverb was PlatinumVerb.
I used it for years.
Then Space Designer arrived.
And I went through a phase of using it on everything.
Then ChromaVerb.
Now there's the Quantec Room Simulator.
Logic's reverbs have changed a lot since I started using it.
But they all do something different.
That's the useful bit.
ChromaVerb – Modern Algorithmic Ambience

This is the one I'd use for modern algorithmic reverb.
Clean.
Wide.
Easy to shape.
Vocals.
Synths.
Pads.
Ambience.
If I want to build a space around a sound, ChromaVerb gives me plenty to work with.
Space Designer – Realistic Convolution (and Your Own Custom Spaces)

Space Designer is convolution reverb.
Instead of generating a reverb, it uses impulse responses.
Rooms.
Halls.
Plates.
Hardware.
Real spaces captured and loaded into the plugin.
I used Space Designer constantly for a long time.
And you can load your own impulse responses.
That opens up another world.
SilverVerb – Vintage Digital Vibe

Old digital reverb.
Grainy.
Artificial.
And sometimes that's exactly what you want.
Drums.
Synths.
Anything that needs to feel slightly older.
Not every reverb needs to sound like a real room.
EnVerb – Creative Envelope Control

EnVerb lets you shape the envelope of the reverb.
That's what makes it interesting.
Gated reverbs.
Swells.
Reverb that moves with the rhythm of the track.
When a normal reverb tail isn't doing what you want, EnVerb gives you another way in.
Quantec Room Simulator – Logic’s Latest Addition

The Quantec is different again.
Rooms.
Spaces.
Depth.
Without always hearing an obvious reverb tail.
I like what it does.
Although I've also found situations where I need to watch the phase and mono compatibility.
I've written about that separately.
You Already Have a Lot of Reverb
That's the point.
Algorithmic.
Convolution.
Old digital.
Envelope-shaped.
Room simulation.
I've got Valhalla.
Lexicon.
PhoenixVerb.
Quantec.
I love reverbs.
But if you only have Logic, you're not short of ways to create space.
4. Saturation


I use a lot of saturation.
Different saturators do different things.
Tape.
Tube.
Transformers.
Clipping.
They're colours.
And I've collected a lot of them.
But there's one Logic plugin I've used for years.
Overdrive

Overdrive was my thing.
I used it all the time.
Bass.
Drums.
Synths.
Anything that needed more weight.
This was before I had a folder full of saturators.
I'd turn up the Drive.
Move the Tone.
Listen.
A sound that felt thin could suddenly become more solid.
More present.
It sat in the track.
I knew Overdrive.
I knew what it did.
And for years, it was how I added saturation in Logic.
Then Came More Saturators
Over time, I started collecting them.
Tape.
Tube.
Transformers.
Different colours.
Different ways of adding harmonics.
And I moved away from Overdrive.
But that doesn't mean it stopped working.
It was doing the job before I knew I needed ten different plugins to do it.
ChromaGlow

Then Logic added ChromaGlow.
And this is a completely different saturation plugin.
Modern.
Vintage.
Retro.
Tube.
Tape.
Five different ways of adding colour.
I've only spent a little time with it.
So I'm not going to pretend it's become part of my everyday workflow.
But it's there.
And that's really the point of this post.
If you're starting in Logic now, you already have a saturation plugin that gives you five different places to start.
The Other Saturation Tools
And ChromaGlow isn't the only option.
There's saturation built into Logic's Compressor.
Soft.
Hard.
Clip.
Clip Distortion can go from a little edge to completely destroyed.
The Exciter adds harmonics higher up.
Bitcrusher gives you another kind of texture again.
Different tools.
Different parts of the spectrum.
Different types of damage.
You don't need all of them.
But they're there.
And if a sound feels too clean, too thin or too polite, Logic already gives you plenty of ways to change it.
5. Delay & Modulation


Some Logic plugins have just stayed with me.
Tape Delay.
Flanger.
Chorus.
I still use all three.
All the time.
Tape Delay

Logic's Tape Delay is one of my regular delays.
I've got EchoBoy.
Comeback Kid.
Plenty of others.
But Tape Delay still gets used.
Darken the repeats.
Add a little flutter.
Let it sit behind the sound.
It does what I need.
Flanger

Usually subtly.
A little movement.
A slight change in the edges of a sound.
It doesn't have to sound like a flanger.
Sometimes I just want the sound to move.
Chorus

Same with Chorus.
Pads.
Synths.
Anything that feels too static.
A little Chorus can give it width and movement.
Again, I don't always want to hear the effect.
I want to notice what happens when I turn it off.
Old Tools Still Work
That's the thing with stock plugins.
You can spend years looking for replacements.
Sometimes the plugin you've been using since the beginning still does the job.
6. Enveloper: Your Secret Weapon for Punch, Presence, and Control

Enveloper is one of Logic's best plugins.
Attack.
Release.
That's the idea.
Need more transient?
Push the attack.
A snare tail is too long?
Pull the release back.
Want a sound to breathe for longer?
Extend it.
You're changing the shape of the sound.
Not compressing it.
Not EQing it.
Shaping it.
Kicks.
Snares.
Claps.
Percussion.
Even pads.
Once you understand what Enveloper is doing, it's one of those plugins you can use without really thinking about it.
You hear the shape you want.
And change it.
7. Width, Stereo & Utility Tools


Logic gives you a lot of control over the stereo image.
And some of the simplest tools are the most useful.
Direction Mixer

Width.
Direction.
Simple.
I use it when I want to pull a stereo sound in or open it out.
No complicated setup.
Move the Spread control.
Listen.
Stereo Spread

Stereo Spread works differently.
It spreads selected frequency bands across the stereo field.
That's why I like it.
I can control which part of the frequency spectrum gets spread.
I use tiny amounts.
Sometimes 1 or 2% is enough.
You don't need to hear the widening.
The sound just opens slightly.
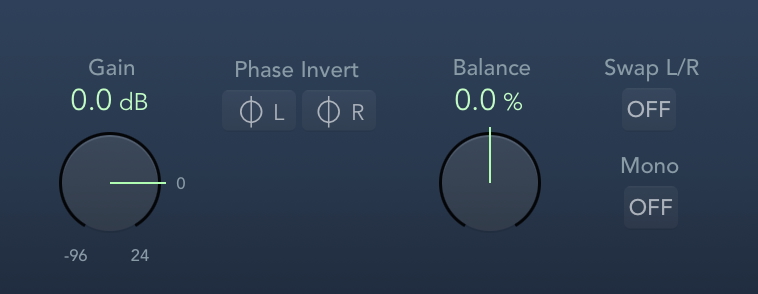
Gain

The Gain plugin looks like nothing.
But I use it.
Mono.
Phase invert.
Balance.
Clean level control.
It's a utility plugin.
And every mix needs utility plugins.
Multimeter

If I'm working with width, I want to know what's happening in mono.
That's where Multimeter comes in.
Correlation.
Goniometer.
Spectrum.
The meter can show me where to investigate.
My ears still make the decision.
8. Mastering in Logic


I mix into a master chain.
Compression.
Clipping.
Saturation.
Multiband.
Limiting.
That's part of how I hear the track.
When I move towards mastering, the limiter comes off first.
Then I listen to everything else.
One plugin at a time.
Is the compressor part of the sound?
Keep it.
Is the saturation adding something?
Keep it.
Is something only there because I was pushing the mix louder?
Maybe it can go.
Then I look at the level.
The peaks.
The headroom.
And work from there.
Mastering Assistant

Logic also has Mastering Assistant.
It's fast.
It analyses the track.
Makes decisions.
Gets you somewhere quickly.
For demos.
Previews.
Or just hearing another version of the track.
It's useful.
But it isn't how I make my final decisions.
You Can Master in Logic
That's the point.
EQ.
Multiband compression.
Saturation.
Stereo control.
Limiting.
Meters.
The tools are already there.
You don't need another DAW to master a track made in Logic.
You need to know what you're listening for.
It's Not the Plugins
I use third-party plugins all the time.
I'm not going to pretend I don't.
I've spent years collecting them.
And some of them do things I can't get anywhere else.
But I could mix a record using nothing but Logic's plugins.
That's the point.
If your mix isn't working, another plugin might help.
But it might not.
Sometimes you need to understand the tool that's already in front of you.
Turn the dials.
Listen.
Learn what it does.
The tools are already there.